An AI selfie generator turns a single photo of your face into dozens of polished portraits — studio headshots, cinematic looks, themed avatars — without a camera, a ring light, or a photographer. Upload one selfie, pick a style, and the AI does the rest.
This guide covers how to make AI selfies with Deevid AI, what styles are worth your time, and the honest answer to the question everyone asks first: how much of it is actually free.
What is an AI selfie generator?
It’s a tool that takes a reference photo of you and generates new images that keep your face but change everything around it — lighting, outfit, background, art style. The good ones preserve likeness (you still look like you) while giving you results you couldn’t shoot at home: a clean LinkedIn headshot, a film-noir portrait, an anime version of yourself, a profile picture that actually stands out.
The use cases are why search demand is high and steadily transactional — “ai selfie generator” and “free ai selfie generator” pull well over a thousand searches a month combined. People want better profile pictures, dating-app photos, professional headshots and avatars, and they want them in minutes.
Is an AI selfie generator free?
Partly. Most tools — Deevid included — let you generate on a free tier so you can test likeness and quality before paying. The catch is the usual one: free output is watermarked and not licensed for commercial use, and you get a limited batch of credits.
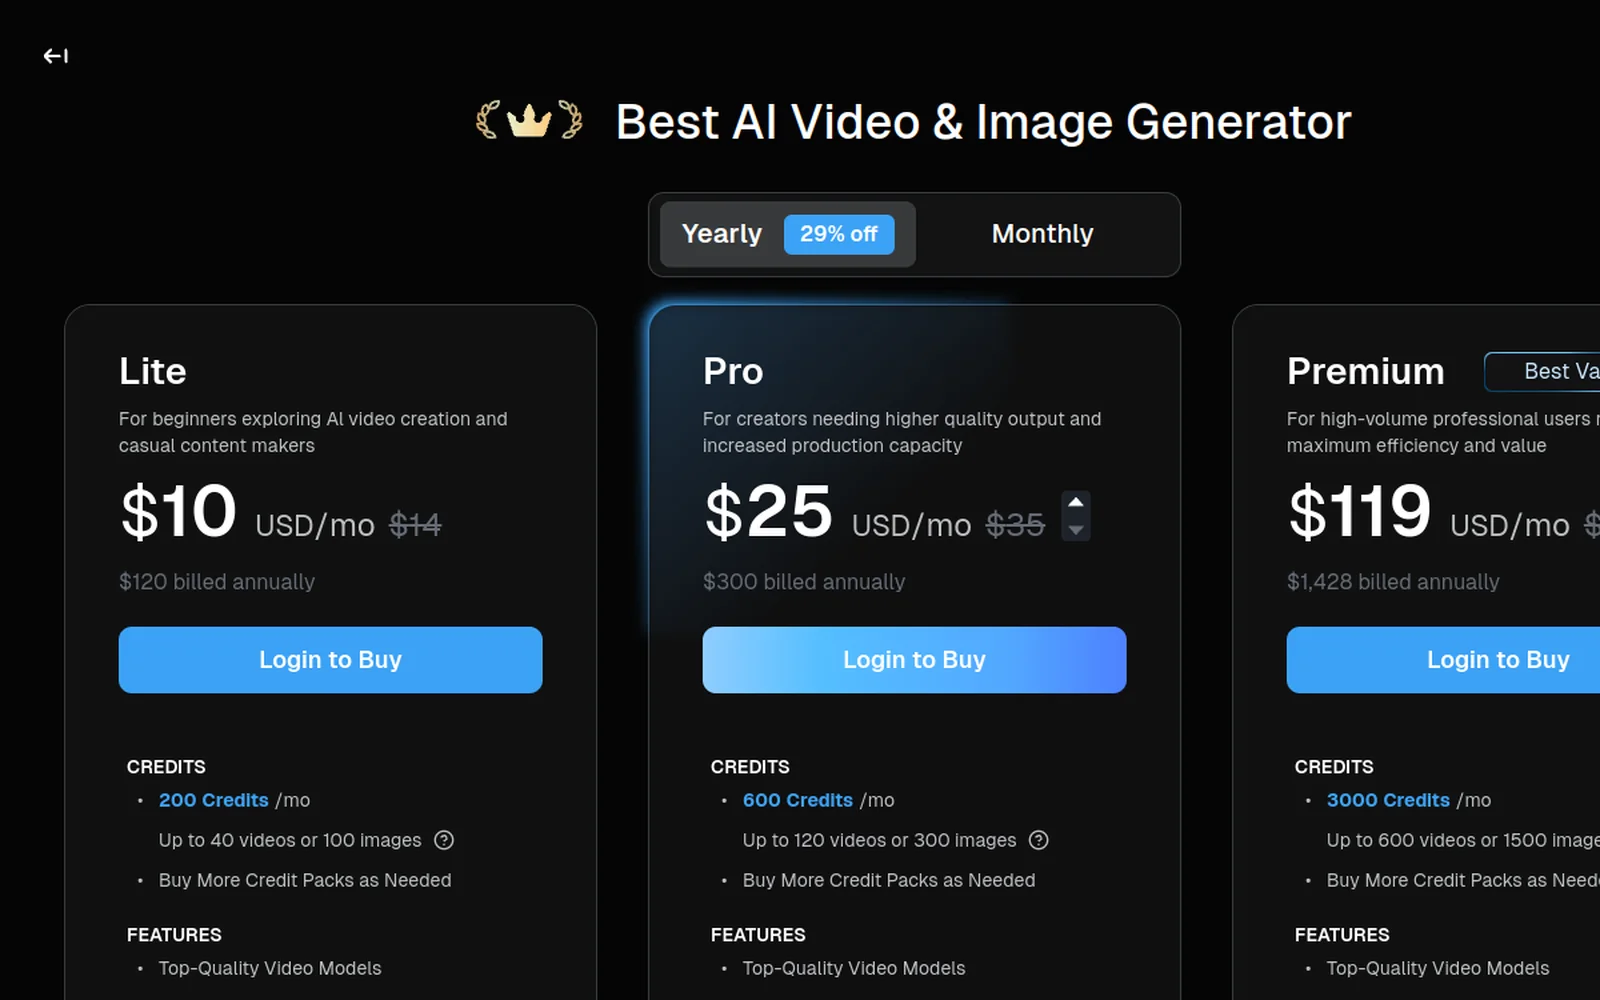
So the practical path is: generate a few on the free credits to confirm the AI captures your face well, then move to the $10/mo Lite plan if you want clean, usable, watermark-free portraits. Test before you commit — our take on whether Deevid AI is legit explains why that order matters.
How to make AI selfies, step by step
Here’s the walkthrough, then the steps:
1. Upload a clear reference photo
The whole result hinges on your input. Use a well-lit, front-facing, unobstructed photo of your face — no sunglasses, no heavy shadows, no group shot. The cleaner the reference, the better the AI holds your likeness across every generated style.
2. Pick a style or write a prompt
Choose a preset look (studio headshot, cinematic, anime, vintage film) or describe one:
Professional studio headshot, soft key light, neutral grey background, sharp focus, business casual.
Be specific about lighting, background and wardrobe — those three details do most of the work in making a selfie look “shot,” not “generated.”
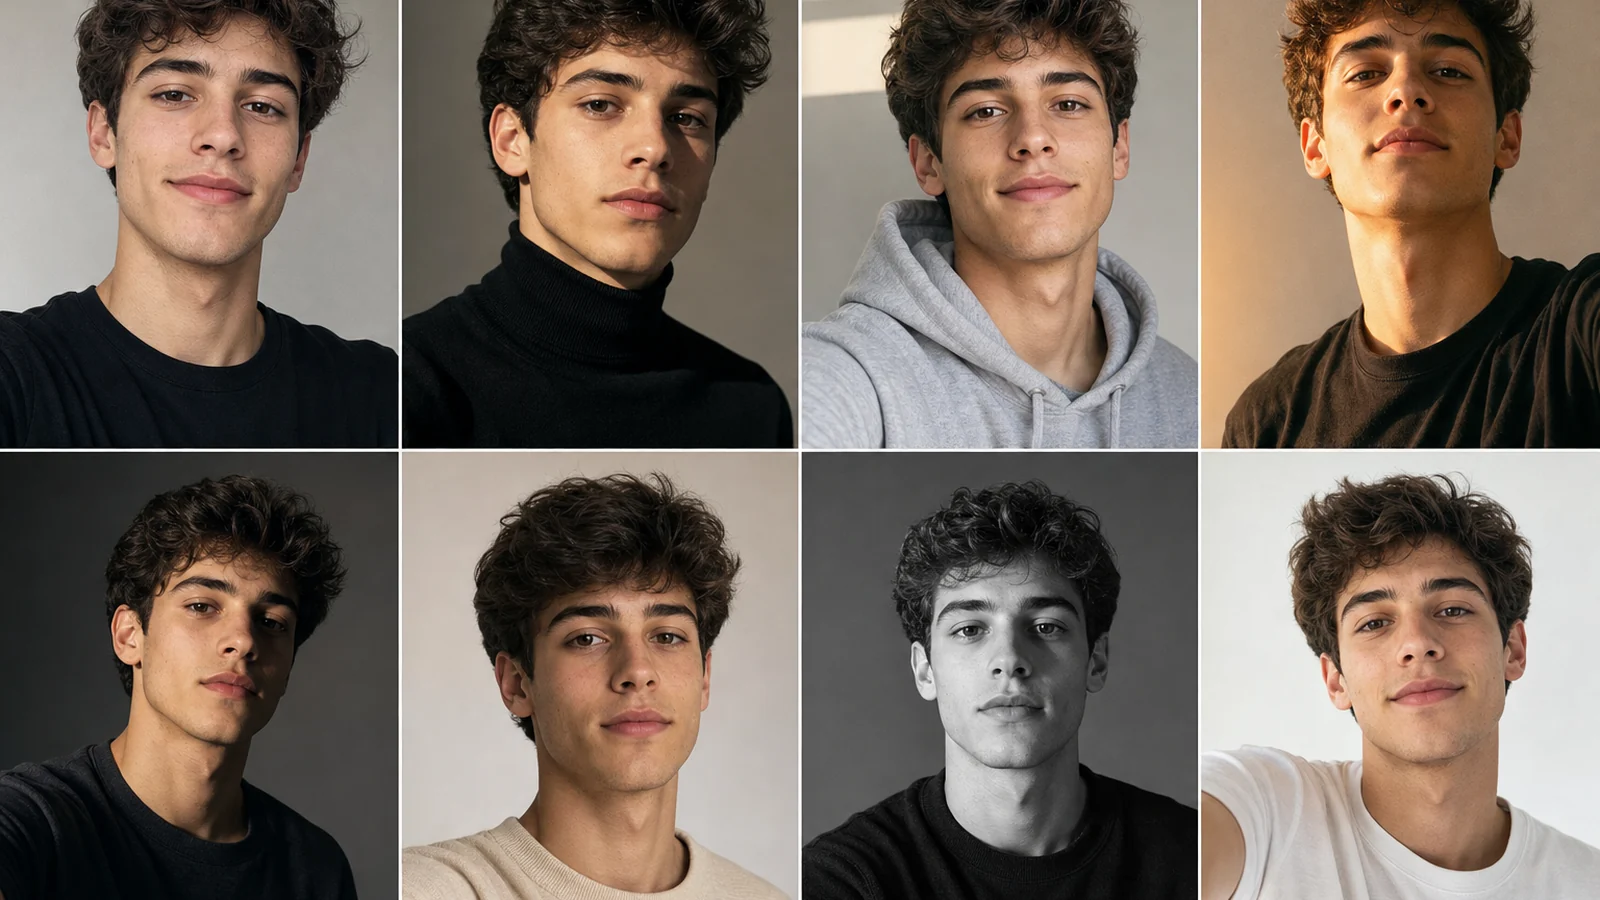
3. Generate and compare
Run a small batch and compare. Judge two things: likeness (does it still look like you?) and quality (is the lighting and detail clean?). If likeness drifts, swap in a clearer reference photo rather than rewriting the prompt — the input matters more than the wording.
4. Refine and download
Pick your best result, refine the style if needed, and export. On any paid tier the download is watermark-free with commercial rights — important if it’s going on a CV, a business profile or a paid product.
Best styles to generate
Some looks consistently outperform:
- Professional headshots — the highest-value use. One good reference photo replaces a studio session.
- Profile pictures / avatars — bold, stylized looks that stand out in a feed.
- Cinematic portraits — film-grade lighting for a dramatic personal brand shot.
- Anime / illustrated — fun avatars for social and gaming.
If you want talking-head video avatars rather than still selfies, that’s a different feature — see how Deevid stacks up for that in our Deevid AI vs HeyGen comparison.
AI selfies vs a real photoshoot
Worth being honest about the trade-off, because an AI selfie generator isn’t a perfect substitute for a camera — it’s a different tool with a different sweet spot.
What you gain: speed and volume. A studio headshot session costs time, money and scheduling; an AI generator gives you twenty usable variations in the time it takes to pick an outfit. You can test a dozen looks — corporate, creative, casual — and only commit to the ones that work. For profile pictures, avatars, and first-draft professional headshots, that flexibility is hard to beat.
What you give up: absolute fidelity and authenticity. AI portraits can subtly smooth features, miss a specific detail, or drift on likeness if your reference is weak. For a passport photo, a legal document, or a context where “this is exactly what I look like” is non-negotiable, shoot a real photo. For most online uses — where “a great-looking version of me” beats “a mediocre real photo” — the AI route wins on cost and convenience.
The smart move is to treat it as a complement: use AI selfies for your everyday online presence and the occasional polished headshot, and save the real shoot for the handful of situations that genuinely require it. Run a test batch on the free credits, judge the likeness against your own eye, and you’ll quickly know which camp each use case falls into.
Tips for better AI selfies
- Reference quality beats prompt length. A sharp, evenly-lit photo fixes more than any clever wording.
- Generate in batches. Likeness varies between runs — make several and keep the best.
- Match lighting to purpose. Soft, neutral light for professional; dramatic for personal-brand.
- Avoid extreme angles in your reference — front-facing holds likeness best.
FAQ
Is there a free AI selfie generator? Yes — Deevid’s free tier lets you generate AI selfies to test, but the output is watermarked and not for commercial use. Removing the watermark requires a paid plan from $10/month.
Do AI selfies still look like me? With a clear, front-facing reference photo, yes — likeness holds well. Poor or obstructed reference photos are the main cause of drift.
Can I use AI selfies professionally? Only on a paid plan, which removes the watermark and grants a commercial license — needed for headshots on a CV or business profile.
How many photos do I need to upload? Often just one clear selfie. A better single reference beats several poor ones.
An AI selfie generator is the rare AI tool with an obvious, practical payoff: one clean photo in, a stack of usable portraits out. Confirm the likeness on the free credits first, then go paid for clean, watermark-free results — and never shoot a headshot the hard way again.